How to Design 3D iPhone App Store Screenshots
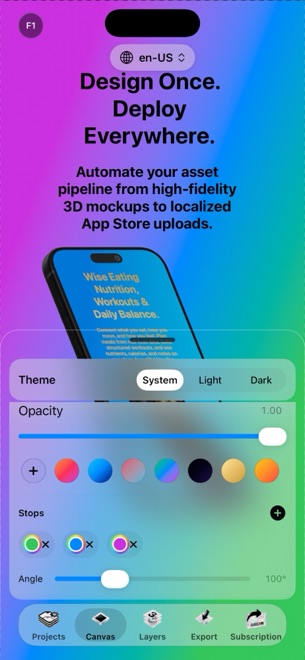
Raw rectangular screenshots look flat in App Store search results, yet over-tilted 3D renders make interface text impossible to read on a phone screen. The sweet spot is a true 3D device mockup lit cleanly and angled just enough to add depth without warping your UI. StoreFront Studio renders real 3D iPhone and iPad models with RealityKit right on your device.
What true RealityKit 3D models do that flat PNG frames cannot
Traditional screenshot templates paste your screen behind a static 2D bezel graphic. The moment you want a slight perspective turn, a close-up crop on a toolbar, or rim light catching the titanium edge against a dark background, a flat frame breaks down.
StoreFront Studio renders iPhone and iPad hardware in real 3D space with RealityKit. You can rotate on any axis, adjust scale and position, toggle physically accurate materials on or off, and tune studio lighting and depth of field interactively.
- Exact 3D device frames matched to each iPhone and iPad generation.
- Physically accurate materials that respond naturally to studio light.
- Adjustable rotation, scale, 3D placement, and depth of field.
Keep rotation angles restrained so UI text stays legible
A forty-five-degree isometric spin looks dramatic on a huge desktop monitor and completely illegible inside a two-inch App Store search thumbnail. Remember that shoppers scan your screenshot for less than two seconds while scrolling.
Use subtle five- to fifteen-degree yaw and pitch shifts on one or two hero slides to create visual energy, then return to near front-on angles whenever a slide showcases dense charts, lists, or editors.
- Place your clean app capture onto the matching 3D iPhone or iPad model on the canvas.
- Position the device slightly lower in the frame so two clear lines of headline copy sit comfortably at the top.
- Apply a modest rotation on slide one or two, then adjust the studio light so specular highlights frame the bezel without washing out the screen.
- Toggle depth of field gently only when framing a close-up hero detail, keeping the main UI crisp.
Match device materials to your background palette
Dark-mode interfaces often disappear into dark backgrounds unless subtle edge lighting separates the hardware chassis from the canvas. Turning on physically accurate materials with a soft top-left studio light creates an instant crisp silhouette.
Conversely, if your brand uses bold, saturated gradients and playful typography, switching off metallic reflections can keep the frame understated so the eye goes straight to your app screen.
Audit the whole five-slide strip side by side
Varying camera angles wildly on every single slot makes a product page feel chaotic. Pick two repeatable poses — such as a gentle hero angle for slide one and clean front-facing frames for slides two through five — so the sequence reads like one cohesive storefront.
Shrink your preview down to phone-thumbnail width before exporting. If both the headline and the primary button or chart inside the 3D screen read effortlessly without zooming, your staging is ready.
Are StoreFront Studio mockups flat images or real 3D models?
They are real 3D iPhone and iPad models rendered with Apple's RealityKit engine, supporting full 3D rotation, studio lighting, materials, and depth of field.
Does Apple allow 3D angled device frames on the App Store?
Yes, provided the screenshots accurately depict your real in-app UI in action and match the target device family (such as iPhone frames for iPhone slots).
Can I edit 3D scenes on iPhone as well as Mac and iPad?
Yes. The full RealityKit 3D editor runs natively across iOS 26, iPadOS, and macOS.